How to Create a Front Page
-
Go to Legal Binder.
-
Open the menu on the left and choose Documents in project.
-
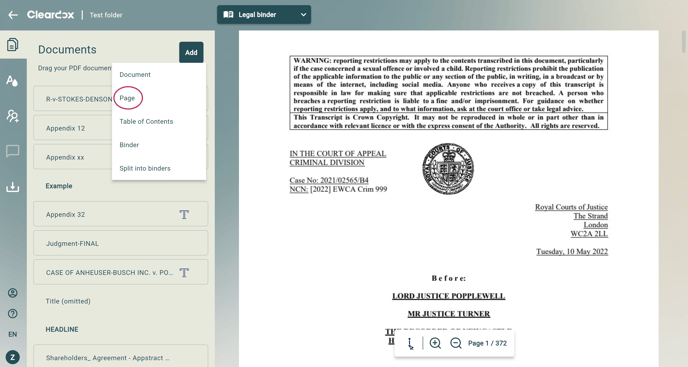
Click on Add, then select Page.
-
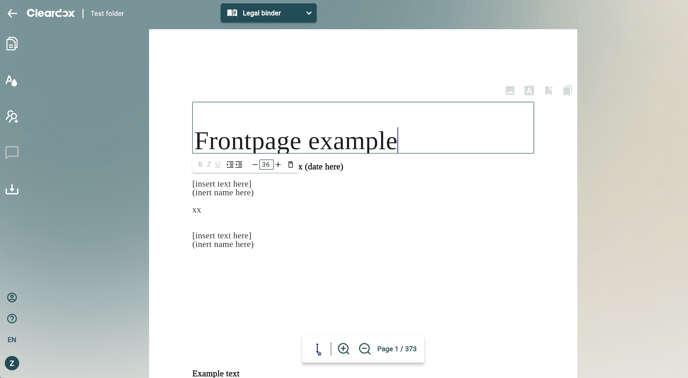
A blank page will be created that you can edit. You can add text directly on the page - like title, date, case name.
-
You can also edit the header and footer with relevant details - e.g. company logo, case number, page number, contact info.
Open the menu on the left and choose Documents in project.

Click on Add, then select Page.
A blank page will be created that you can edit. You can add text directly on the page - like title, date, case name.
What a Front Page Can Include
-
Project/case name
-
Client and opposing party names
-
Date and version (if relevant)
-
Company logo
-
Short description of the project or case
-
Contact information
Why a Front Page Is Useful
-
First impression: A neat front page makes your document look professional at first glance.
-
Identification: Clearly shows who the sender is and what the document is about.
-
Organization: Helps both the recipient and yourself understand which case or project the binder pertains to.
-
Reusability: Once you’ve designed a front page layout, you can reuse it in other projects by saving it as a template.
Tips for a Professional Front Page
-
Use clear, consistent fonts.
-
Choose a layout that matches your other documents for cohesive branding.
-
Ensure the logo is high resolution and well placed — centered or aligned properly.
-
Consider including page numbers, especially if the front page counts in the overall PDF pagination.
Note: When you use the front page feature in Cleardox, the page acts like any other page in the binder — it is included in the page count, and edits are saved automatically.
Conclusion
Creating a front page in Cleardox is simple, but it makes a big difference. A well-designed front page gives a professional look, makes the document easier to identify, and enhances structure. Use it thoughtfully - not just for presentation, but as a tool throughout the lifecycle of your case.